

|
|
|
How To Build a RobotGeneral Robot Building Questions The Big PictureBuilding your robot is a fun and exciting experience. Sometimes though, it can be a little frustrating when you are not sure about a certain aspect of the build. This is a step by step guide to getting your robot up and running. We will go over some robot basics, help you with your part selection, and give you some assembly advice. To get started use our Custom Robot Request Page as a guide with the questions it contains to get a good idea of what kind of robot you want to build. You may also submit the form if you would like some personal assistance.
Sections on this page:
 
Some questions you want to ask yourself
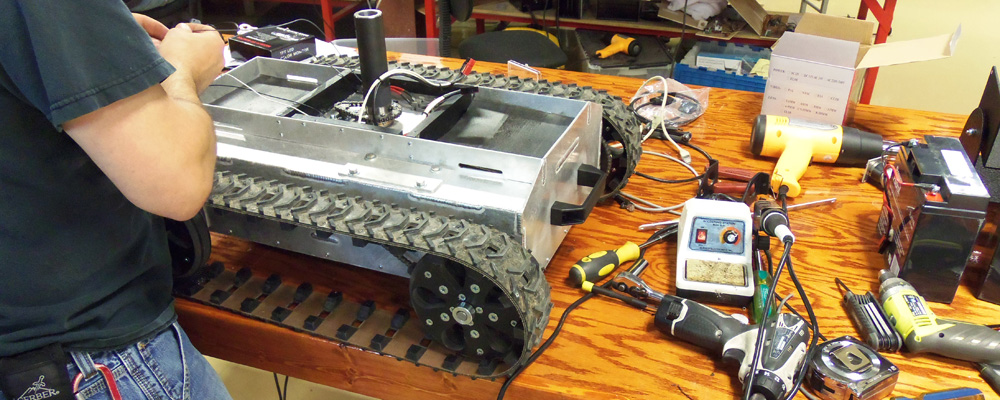
The basics of our Robot KitsOur Robot kits are designed based on years of experience of designing standard and custom robots. All the components are designed to work together. If you do not have much experience building robot, it is best to start with one of our kits. If you go at it from scratch, it can be done, but sizing motors, wheels, batteries, etc. comes from a lot of experience and trial and error. All our robot kits have options listed at the bottom of the page allowing you to customize the robot. Standard items and options are selected for a default configuration. The options are listed as links and can be clicked to view further details. We offer many different motors, motor controllers, batteries, etc. so you can configure the robot to your exact needs. The weight of the robot, its capacity, speed, etc. depend on how the robot is configured. You will have to click on the option item details to determine weights, sizes, etc. Most of our robot kits can be purchased in kit form or assembled. Typically, the kits are offered unassembled as an option. If you have never built a robot, done much soldering or mechanical assembly we recommend you opt for us to assemble it for you. Besides the expert assembly, we will test it, if anything is not right (such as a defective motor or motor controller, battery charger, etc. we will replace it and make sure everything is ready to run when you receive it. How does a robot turn?Most of our robot platforms are skid steer robots (left and right wheels are slowed down, stopped or reversed to turn). Since it has to skid to steer, friction is the major contributing factor for sizing your components. The more the robot weighs, the harder to turn. The higher the friction coefficient (deep grass, carpet, tracks, etc.), the harder it is to turn. The lower RPM motors have lower speed, but more torque for easier turning. The default options listed for our robot kits are what we recommend as a good starting point. Contact us if you need help selecting options or need custom configuration. A few words on motorsOur line of robots are named after the size motor gearbox they use. Some platforms use a chassis with a motor bolted to it and a wheel bolted directly to the motor shaft. This works fine for light loads, our Compact ATR robot is a perfect example. The durability of the robot platform is directly related to the durability of the motor and gearbox. The more weight you put on the chassis the more the motor has to support. For larger loads we have designed a platform that takes the vast majority of the weight off the motor and gearbox by adding a longer shaft and supporting it with an industrial ball bearing. This platform is demonstrated in our IG32 and IG42 ATR examples. The motor is still coupled to the wheel directly just with a longer shaft that runs through a bearing. For even larger loads we designed a platform that takes all the load off the motor completely like our Heavy Duty ATR and Enclosed Heavy Duty ATR. The wheel is bolted to a high strength axle and that is supported by two industrial grade ball bearings. Number 25 chain and sprockets connect the motor to the axle. The bearings do what they are designed to do, the motors do what they were designed to do, and the chain and sprockets link them to each other. Together this makes for a truly heavy duty robot platform. Let's Get Started!There are a lot of decisions that need to be made once the general questions are answered. Most of this is in order. In some cases you can jump around, but basically you cant pick your batteries, until you know what your motors are, and you cant pick motors until you pick a platform, etc. Tracks or Wheels?TracksEveryone thinks tracks are cool, they are, but it comes with a price.
If you are ready to move forward with a tracked robot
WheelsWheels are by far an easier and less expensive option than tracks.
Wheel TypesBefore you decide on the platform, there is another fork in the road with wheeled robots. Do you want to use standard wheels, omni wheels, or Mecanum wheels?
If you are ready to move forward with standard wheels:
If you are ready to move forward with vectoring wheels:
MotorsYou need to gear an electric motor down for the same reason you have a transmission on a car or motorcycle. To get the HP the RPM is typically brought way up, especially in electric motors. If you run it 1 to 1 it will not have enough torque to move, and if it could, it would be way too fast. Take your car, for example. A normal transmission starts in 1st gear, which is the most reduced so you have the low end torque to start moving, then as you speed up you change gears to get more speed. With a single speed (an electric bike, golf cart, or robot) you have to find the right balance so you have enough torque to get started from zero speed, but then enough top end speed. If you gear it down too much you will have plenty of power, but never get any speed. If it's geared too high, you will have trouble getting it started, especially up a hill, etc., but then you will have a fast top end. You need to find the balance where it works well for both. The big electric motors will help because they will muscle through it if you don't have it geared just right, but if it works too hard you will be drawing a ton of current and burning up your batteries! So say you want to get 25 mph and you have a 2 ft diameter tire, 25 mph = 25 * 5280 / 60 = 2200 ft/min. For every revolution of the tire: 2 ft * 3.14 you go ~6.25 ft. So you want the tire to rotate at 2200 / 6.25 = 352 RPM. Let's say your motor is 4000 RPM full speed, therefore you need to gear it down by 1 : 6.25 So if you are using chain, you put the smallest sprocket on the motor, say 10 tooth (this will be driven by the pitch of the chain and the size of the motor shaft) therefore you will need a 62 tooth sprocket at the wheel. Robot Speed Calculator
To Figure out how much HP or toque you need is a lot more complicated. Trial and error and experience are the best tools for this. All our motors have torque curves listed with them to aid in the decision. If you are not too sure what size motor will work for you and you are dead set on building it yourself instead of using one of our pre-configured kits, then chain is a great way of hooking up you motors and being able to change the speed and torque without changing the motors. We offer chains and sprockets for doing all sorts of gear reductions. If you want the motor to spin the same speed and have the same torque as the motor, then you go 1:1 (i.e. a 15 tooth to a 15 tooth). If you want more torque and less speed then you gear it down like 1:2 (15 tooth to 30 tooth), so the motor will turn two times for per 1 wheel revolution resulting in half the speed, but twice the power. If you want to speed things up and have extra power you can go 2:1 (i.e. 30 tooth to 15 tooth) so every turn the motor makes the wheel will make 2, but you will have half the power. The advantage of chain drive is you can select any combination of reductions to tune your robot to work best for the weight and terrain, etc. You want to try to tune it so the motor works at its peak efficiency during normal operation. Typically you do not want to gear up too much because you lose some efficiency with reductions, etc. So if you are using a gear motor and have a 1:17 reduction in the gear motor, then use a 3:1 speed up, you are losing a lot of your power to the efficiency of gearing down, then back up. We have several motors to choose from. Depending on the size of your robot, how fast you want it, etc. as discussed above select the motors. If you are still having trouble deciding on the motor, select one of pre-built kits that already have the motors selected as default. If you are doing a very small robot see our Servo Modification Support Page so you can use hobby servos and modify them for continuous rotation. Available Motors
Motor ControllersMotor Controllers take signals from a microprocessor or radio control receiver and convert it into a high current varying voltage. We carry many variations and sizes of motor controllers. We now carry RoboteQ motor controllers, some of which will take encoder inputs for speed and / or position control. For Help selecting the right motor controller review each item and their associated data sheets / manuals. For a summary of all the motor controllers and some example schematics, see our motor controller support page.
Robot BatteriesWhen selecting the appropriate batteries for your robot you need to size them by voltage to match the desired motors and motor controller, then by maximum current output and then by the battery type and capacity. Voltage RatingOur motors are rated for either 12V or 24V. Incorrectly providing a 24V source to a 12V motor will immediately cause permanent damage. If only connected for a short period of time the observed damage will be limited to a whining sound when the motor is moving. A prolonged over-voltage condition will cause catastrophic damage to the motor and this may pose a significant risk of fire, injury, or death. Be sure that the appropriate power is applied to the motors. If the motors receive insufficient voltage, say 12V to a 24V motor, the motor will either move very slow or not at all. In order to distribute the weight of a battery evenly across the robot, its common practice to use multiple 12V batteries to prevent the robot from favoring one side while driving. For a 12V motor system the batteries will need to be connected in parallel and for a 24V system, they will be need to be connected in series. Note: When using a multiple battery system, always be sure that each battery is individually fused. Maximum Current OutputWhen selecting the appropriate battery source, it is often wise to be sure that the battery can produce the amount of current needed by your motors and motor controller. Take, for example, Dimension Engineerings Sabertooth 2x12 motor controller. It has two channels and each channel is capable of outputting 12A so for the motor controller to be able to supply a total of 24A to a pair of motors the battery providing power to the system must be capable of supplying that amount of current. It is important to note that the motor system may not be the only major component in your system. Be sure to account for the additional loads on your system, such as a computer, control system, sensors, and a radio. Note: For many hobby RC motors, the batteries will be marked with a C rating. This rating will the maximum continuous current discharge that the batteries are capable of. The C rating is a multiplier that can be applied to the battery capacity to get your maximum continuous discharge. For example, a 2,000mAh 10C battery can output a maximum of 20,000 mA or 20A. Battery Type and CapacityThere are three main types of batteries that are discussed here: Lead Acid, Li-ion and NiMH. Lead acid batteries are the cheapest out of the three. These are the batteries that you typically see in a car or a truck. They do not require special circuit protection, only a fuse. The downside is that they are large and very heavy. The second type are Li-ion batteries. You will typically see in most electronics today. They are lighter and more compact than lead acid batteries and are the go-to battery type for RC robotics. One caveat that with Li-ion batteries is that they require specific under-voltage circuit protection to prevent the battery from dropping too low. If this happens the battery will be unrecoverable. All of our Li-ion batteries contain the necessary circuit protection to prevent this from happening. Most cheap RC batteries you see on most websites, do not. The final type of battery are NiMH (Nickel Metal Hydride). These are the highest capacity of the three and they do not have the same circuit protection issues as Li-ion batteries. If you need the robot to run for a long time then it is highly suggested that you look at NiMH batteries. On the topic of battery capacity, it is commonly measured in mAHr (milliamp hours). This is a measurement of how long it would take to discharge the battery if it outputted 1mA of current. Larger batteries are typically measured in AHr which is mAHr divided by 1,000. So, a 12V 2000 mAHr (2AHr) battery will last twice as long, under the same conditions, as a 12V 1,000 mAHr (1AHr) battery. Robot Battery ChargersWhen ordering a robot kit as a base for your project, we offer appropriately sized chargers for the supplied batteries. When picking out your own chargers, it is absolutely critical that you pick the charger with the correct voltage and battery type. Not selecting the appropriate charger will be a fire hazard and cause permanent damage to the battery, charger and your property. Robot ControllersThere are several options for controlling your robot. The big division of remote control is between Analog versus Digital Control. AnalogAnalog Control provides the simplest link between the operator and the robot possible, it is however one way. Video is typically transmitted back over an open analog channel. Analog video transmissions can be viewed on any receiver, both yours or anyone elses. Analog Remotes similar to R/C Aircraft can be used to control the robot, or a custom controller can be made to control and display the video in a case. We offer several types of analog controllers.
DigitalDigital Control of a robot uses Ethernet over a wireless link to control the robot. The wireless link will be over standard WiFi, CoFDM, or a Dual Band Wireless Link similar to WiFi. Our Digital Remotes are enclosed in a Pelican (or Pelican like) case that houses the radio, control joysticks and switches, and the video monitor.
WiringPower and Battery WiringWhen wiring your batteries to your robot there are concerns you must address. Namely, what output voltage do you need and how you are going to charge the batteries. When using two 12V batteries you will need to wire them in parallel to power 12V motors and in series to power 24V motors. The key things to consider is what voltages do you need and how much power The driving force for the main battery will be the motors. We typically use 24VDC motors, they run at half the current for the same power as 12V motors so smaller wires, motor controllers, etc. Do you need a separate battery for the controller or on-board computer, etc. How you going to get those voltages (multiple batteries, voltage regulators, etc.). How much of a load will be on each voltage so your batteries and/or regulators are sized properly. This will help you size your batteries. Simple math, if you have a 1Amp load and a 10Ahr (10,000mAhr) battery, the battery will run for 10 hours in theory. We have a lot more information of wiring on our Robot wiring support page. Motor WiringGennerally motors are wired to a motor controller to provide speed control to motors. The motor controller can be used to change the directions of the motor too. If running motors in parallel (as in a 4WD the two left and the two right motors will be running together in parallel) you can wire them in parallel too. We have a lot of information on how to wire motors, etc. on our Motor Wiring Support Page. Be sure to checkout our Motor Controller Support Page too. SensorsWe offer a wide range of sensors. The more sensors used, the better the autonomy will be. Relying on only one type of sensor for all your positioning will work for simple situations, but will probably cause issues for any complex positioning or for any positioning that requires higher precision. In robotics, sensors can be used to monitor your environment or to determine your robots position relative to some object. Standard sensors for environment monitoring can range from temperature thermocouples, gas, and radiation. The standard positioning sensors are Sonic and IR for object detection and GPS, gyroscopes, and accelerometers to determine relative location, direction and air speed. For ground travel and RPM feedback, a combination of our encoder enabled motors and our encoder buffer board make it incredibly easy to implement your own speed control algorithms and RPM feedback. The encoder can also be used to keep track of the distance traveled, but with skid steer the more you turn/skid the more inaccurate the reading because the wheel slips/skids resulting in encoder counts, but no relative movement. For a complete list of our available sensors, please visit this link Follow these projects that we are doing for autonomous robots to get more details on how we used the sensors to make the robots autonomous.
Please click here for a full listing of our available sensors.
|
|
|
Robots, Parts, & Custom Solutions


##GOOGLEPLUS##
##PINTEREST##
