|
|

|
Robot Electrical PowerRobots need their batteries! Batteries provide the power to the robot. We sell several different batteries. Most of our motors require 24V to run. You can look at the motor pages to see what the current draw is for each motor. If your using small motors and don't have the robot weighted down, the motors won't not draw much juice so a small mAhr battery pack should be fine. However if you are going to load the robot up and run it in thick carpet or grass, or if you just want a long run time, then the larger AHr batteries would be a better choice.
Sections on this page:
Related Support Pages:
Related Categories:
 
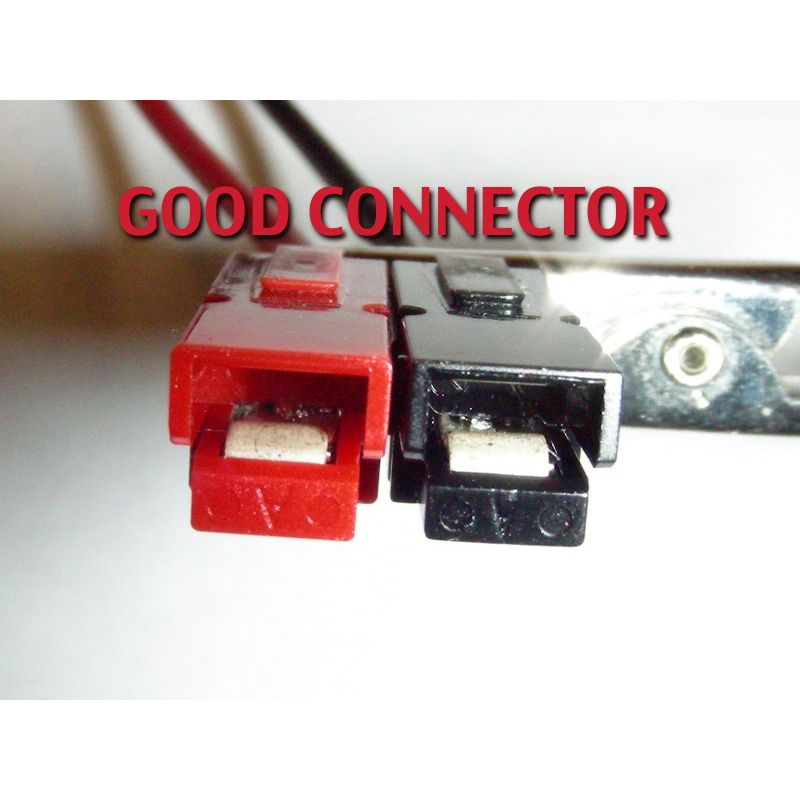
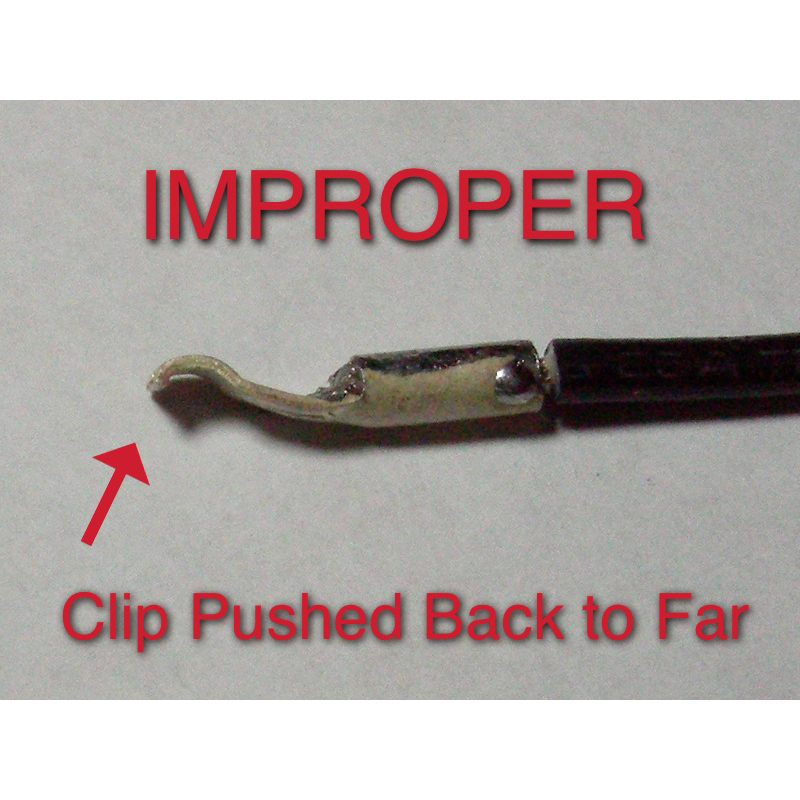
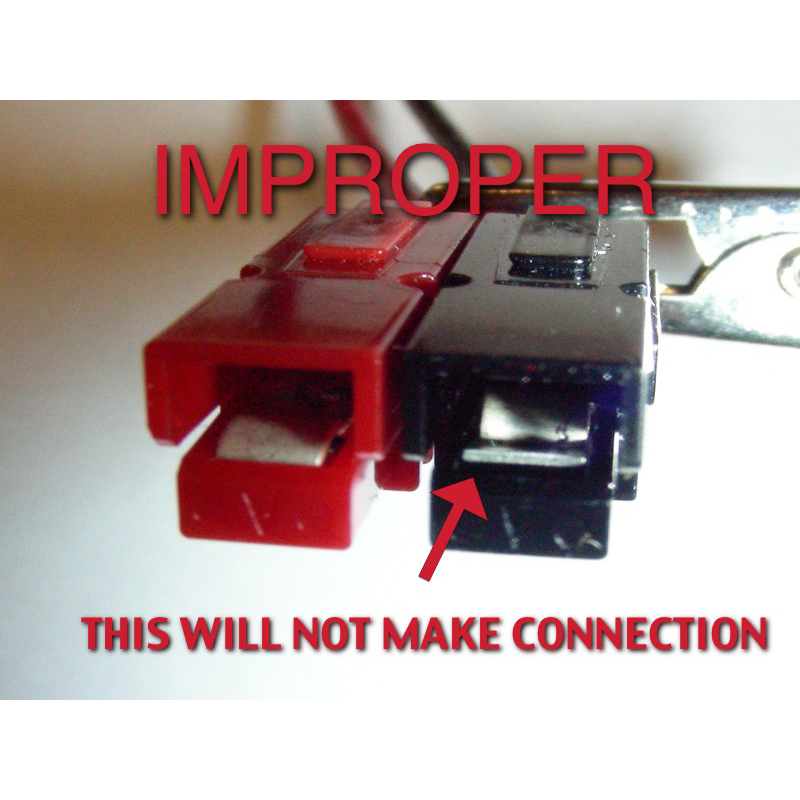
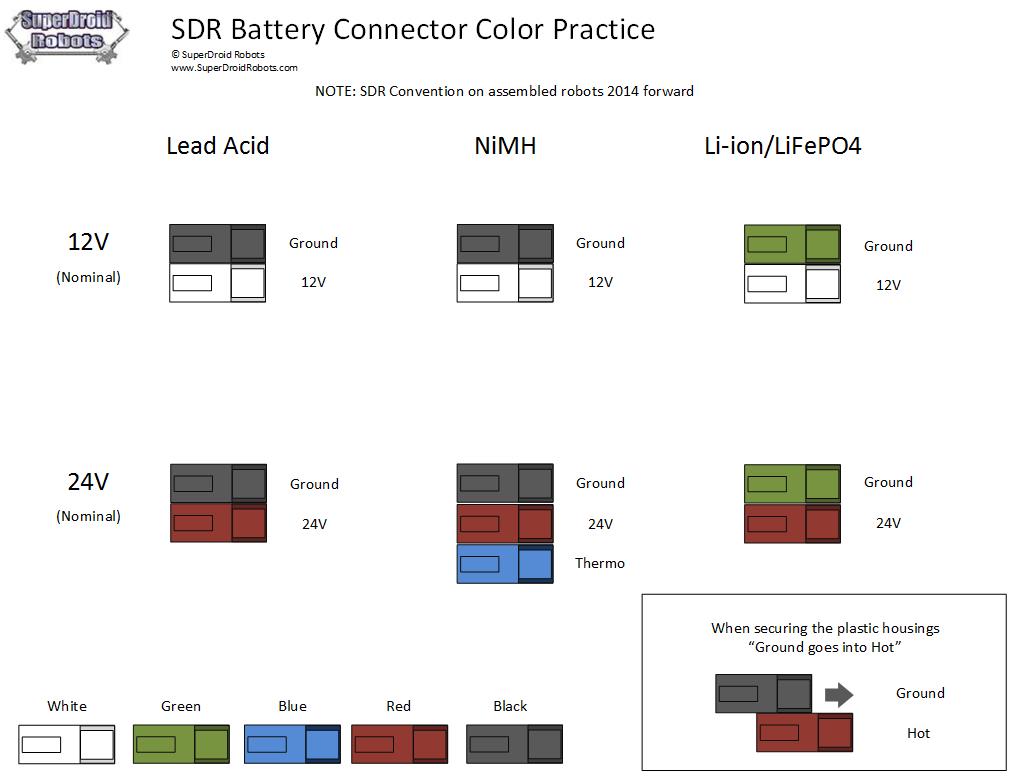
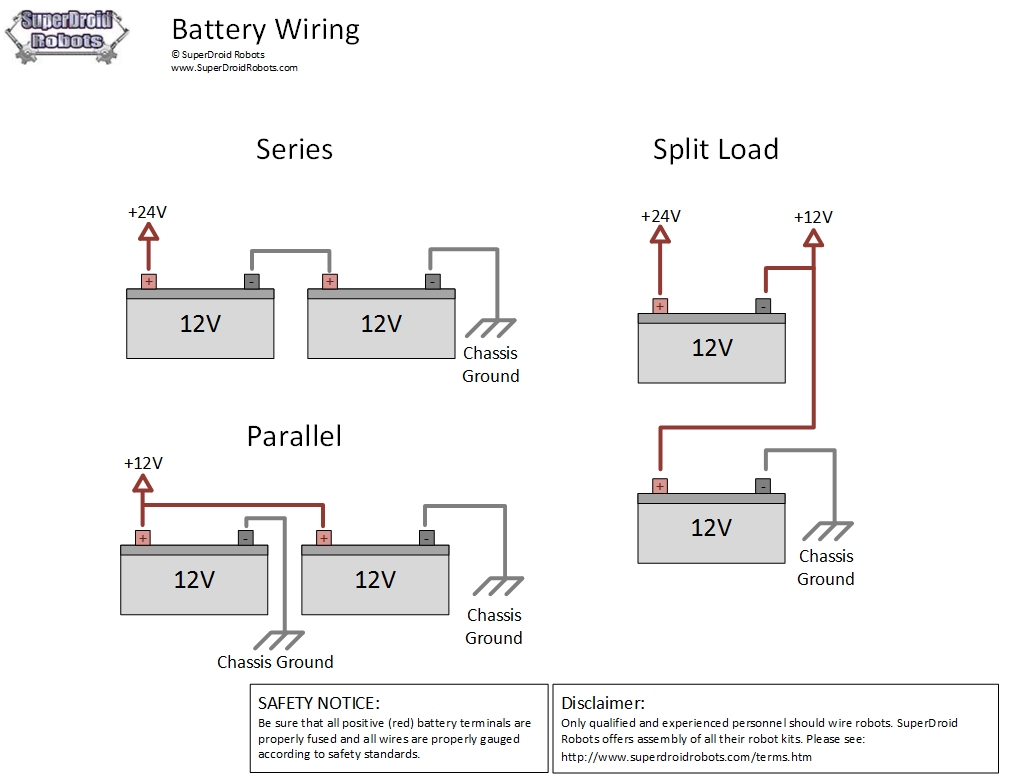
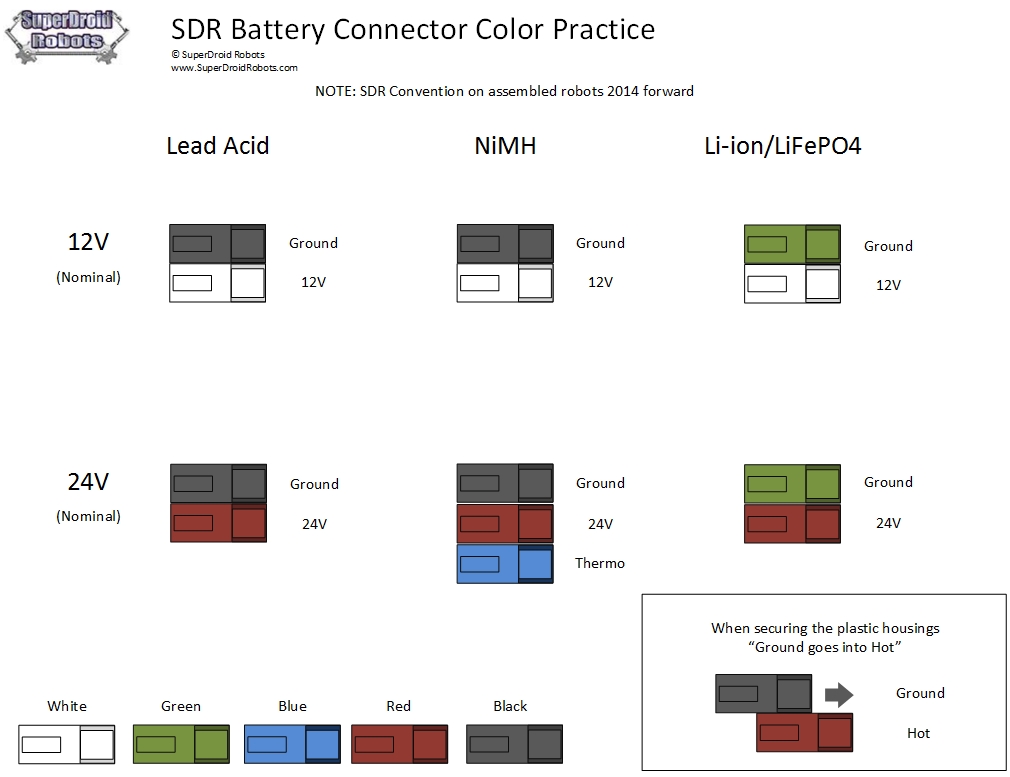
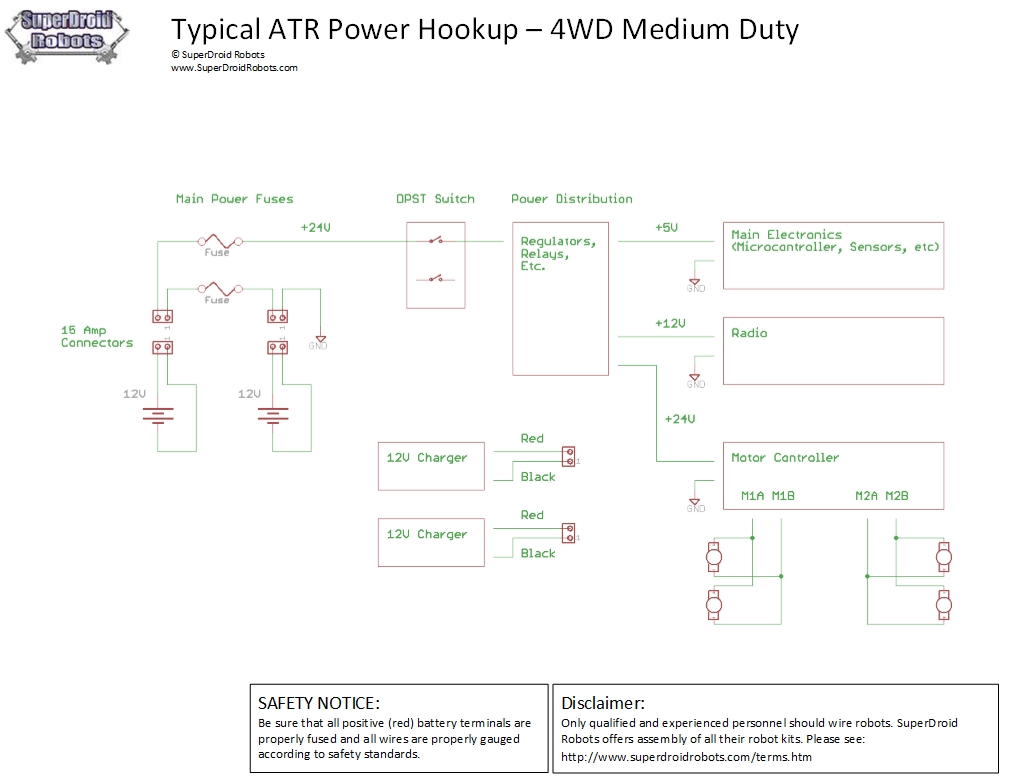
Battery WiringWhen wiring your batteries to your robot there are concerns you must address. Namely, what output voltage do you need and how you are going to charge the batteries. When using two 12V batteries you will need to wire them in parallel to power 12V motors and in series to power 24V motors. In a parallel setup, the positive (red) terminals are connected together and the negative terminals are connected to the chassis. In a series setup, the negative terminal of Battery1 is connected to ground and the positive terminal is connected to the negative terminal of Battery2. The positive terminal of Battery2 is then connected to your robot. The way this works, is that the electricity from Battery1 travels through Battery2 and their voltage levels are added together. In a parallel setup, both batteries will share the load of your system. Meaning your motor controller and motors will pull from both batteries equally. This will result in about doubling your running time. Note: Always be sure to place a fuse after each positive battery terminal for safety. The fuse should be sized so that it is as close to the maximum current, without going under. For charging, it will always be best to be able to charge the batteries individually. Batteries should never be charged in parallel. They can be charged in series, as long as you have a balanced load. This means that your robot should only be pulled power from both batteries equally. Electrical Battery ConnectorsWe typically bring out 15A connectors attached to the battery terminals to provide easy and secure way to charge the batteries on the robot. Depending on the demands of the robot, 15 amp or 30 amp connectors are used. Please see the images below as a demonstration of proper and improper connector crimps and connectors. We only offer red and black connectors for sale, but for reference if you buy one of our assembled robots we have included a diagram showing our standard color codes for battery connectors we used during assembly to help us distinguish between the type of battery and the voltage.
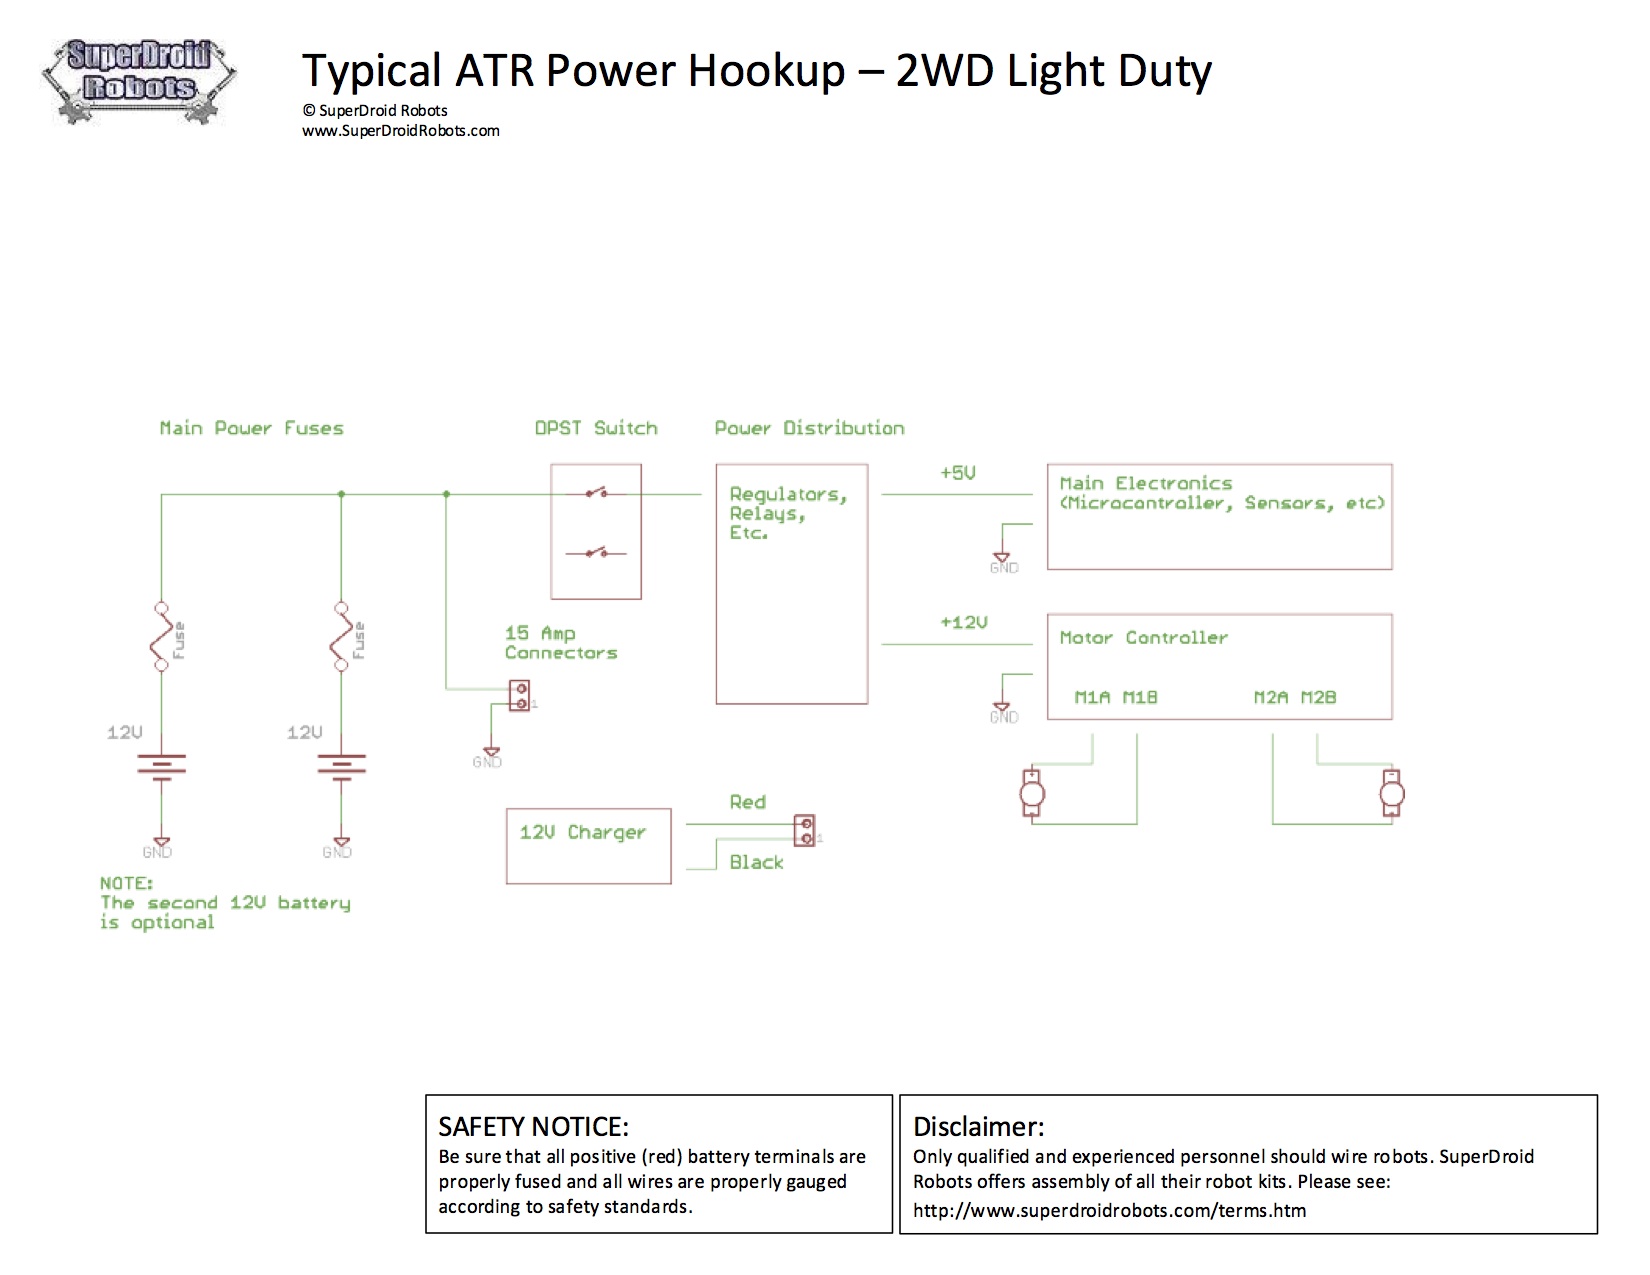
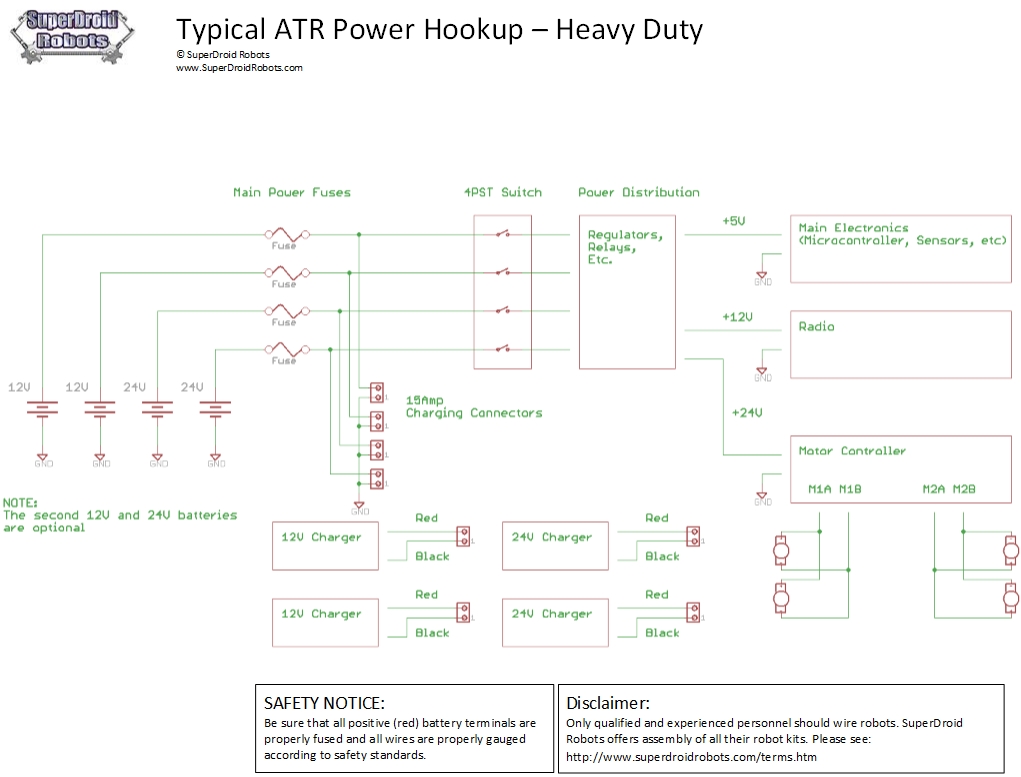
Click on Images for Larger View Typical Power Wiring a RobotThere are lots of different ways to wire up a robot.
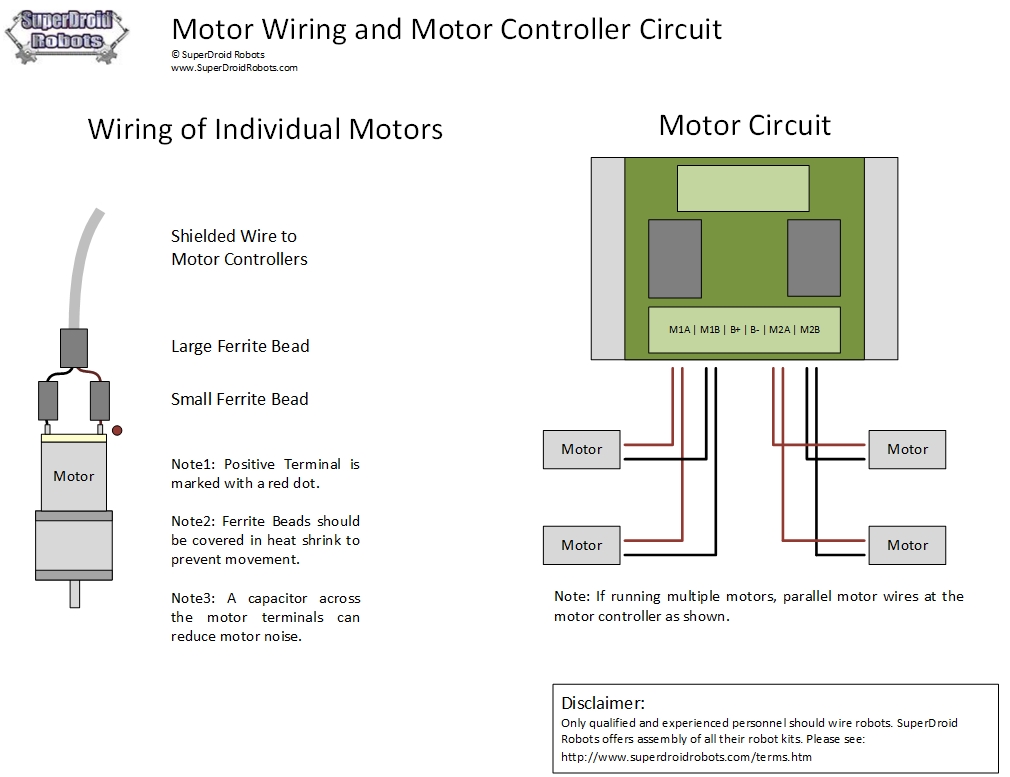
Electrical Motor HookupElectric noise is one of the most frustrating issues when working on robots with DC motors. The EMF coming from the motors will reek havoc on the microcontrollers, any RF equipment, or other sensitive electronic equipment. We recommend you use the following kits to wire your motors. These kits will provide the wiring from the speed/motor controller to the motors. You will need one kit per motor. Follow this link for more information on how to hook up the motors.
|
|
|

Robots, Parts, & Custom Solutions




##GOOGLEPLUS##
##PINTEREST##